使用pelican在GitHub上搭建博客(一)
Posted on Fri 03 April 2020 in 技术,教程,pelican,python,github page
目录
第一步:准备环境
第二步:搭建本地blog环境
第三步:编写blog并本地测试
第四步:上传至gitbu并网络访问
附:更换电脑如何操作
第一步,环境搭建
1、注册GitHub
2、在GitHub上创建空的库
    库名为:***yourname***.github.io(换成你自己的)
    *例如我的:unclevicky.github.io*
3、安装python
4、安装python所需要的包
    pip install virtualenv
    pip install pelican
    pip install markdown
第二步,搭建本地blog环境
1、首先用virtualenv创建一个env
    mkdir blog
    cd blog
    virtualenv env
    env\Scripts\activate.bat  #激活环境(windows)
2、创建pelican目录结构
pelican-quickstart
根据提示进行设置
> Where do you want to create your new web site? [.]
> What will be the title of this web site? 田冲憨娃
> Who will be the author of this web site? unclevicky
> What will be the default language of this web site? [en] zh
> Do you want to specify a URL prefix? e.g., http://example.com (Y/n)
> What is your URL prefix? (see above example; no trailing slash)
unclevicky.com
> Do you want to enable article pagination? (Y/n)y
> How many articles per page do you want? [10]
> What is your time zone? [Asia/Shanghai]
> Do you want to generate a Fabfile/Makefile to automate generation and
publishing? (Y/n)y
> Do you want an auto-reload & simpleHTTP script to assist with theme
and site development? (Y/n)y
> Do you want to upload your website using FTP? (y/N) n
> Do you want to upload your website using SSH? (y/N) n
> Do you want to upload your website using Dropbox? (y/N) n
> Do you want to upload your website using S3? (y/N) n
> Do you want to upload your website using Rackspace Cloud Files? (y/N)
n
> Do you want to upload your website using GitHub Pages? (y/N)n
>Done. Your new project is available at D:\coding\git/blog
文件结构如下:
blog/
├── content \# 写的文章放这里
├── output \# 生成的输出文件(发布的内容)
├── develop_server.sh
├── Makefile \# 方便管理博客的Makefile
├── pelicanconf.py \# 主配置文件
└── publishconf.py
第三步:编写blog并本地测试
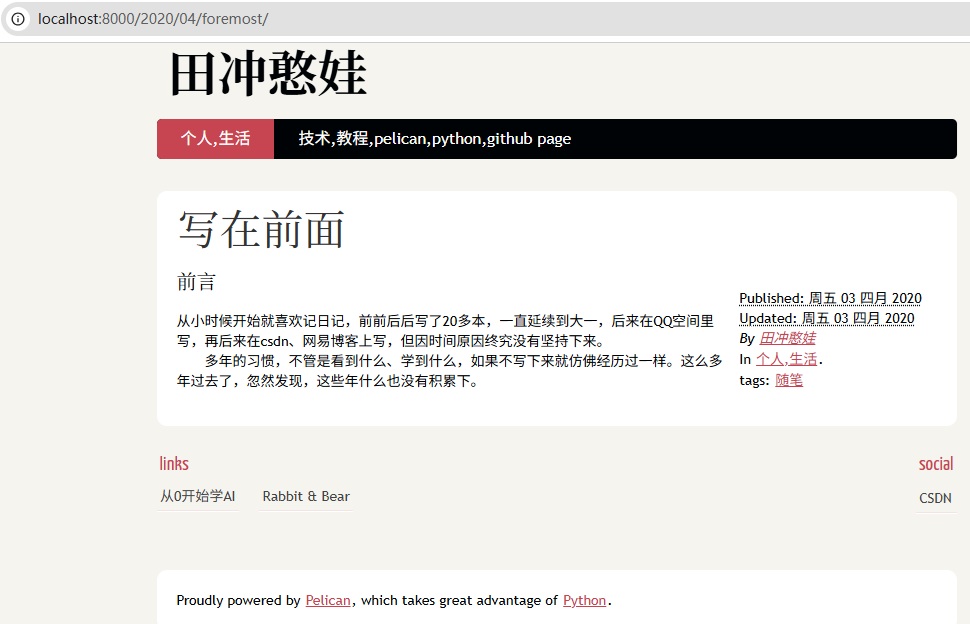
1.在blog/content目录下建立一个markdown文件(例如test.md),内容如下:
    Title: 写在前面
    Date: 2020-04-03 20:37
    Modified: 2020-04-03 20:37
    Category: 个人,生活
    Tags: 随笔
    Slug: buildblog-1
    Author: 田冲憨娃

    ### 前言
    从小时候开始就喜欢记日记,前前后后写了20多本,一直延续到大一,后来在QQ空间里写,再后来在csdn、网易博客上写,但因时间原因终究没有坚持下来。多年的习惯,不管是看到什么、学到什么,如果不写下来就仿佛经历过一样。这么多年过去了,忽然发现,这些年什么也没有积累下。
2.本地测试
    # 在blog目录下执行
    pelican content # 根据content中的内容,生成静态网站到output目下

    # 在output目录下执行
    python -m pelican.server
以上两个命令执行完,没有报错的话就用浏览器打开:127.0.0.1:8000,效果如下:
输入:ctrl + c 停止服务
第四步:上传至gitbu并网络访问
    cd output
    git init
    git add .
    git commit -m "第一篇博客"
    git remote add origin https://github.com/yourname/yourname.github.io.git
    #换成你自己的Github账号和库名称,例如我的 https://github.com/unclevicky/unclevicky.github.io.git
    git push -u origin master
最后访问:https://yourname.github.io/
例如我的就是:https://unclevicky.github.io/
附:更换电脑如何操作
1、执行上述第一步
2、执行上述第二步
3、先把gitbug服务器上的代码pull到output里
    #output目录
    git clone https://github.com/unclevicky/unclevicky.github.io.git .
4、在content目录编写新的md,之前的md也可以copy过来
5、生成博客文章文件,并上传到gitbub上
    # 在blog目录下执行
    pelican content # 根据content中的内容,生成静态网站到output目下

    # 在output目录下执行
    git stash  # 将修改存⾄缓存区(开关机不会丢失)
    git stash pop   #需要提交前恢复暂存区内容
    git add . # 添加文件,已经添加的不会重复添加
    git commit -m '今日的博客'
    git push -u origin master # 提交